


Showit has over 100 Google Fonts available for free. But did you know you can also add a custom font to Showit?
That’s right! Those beautiful, custom fonts you have for your branding can easily be added to Showit.
The only caveat is with Adobe fonts. Adobe fonts aren’t currently supported by Showit but I’ve got an easy workaround for you that I’ll share later on in the post!
Adding a custom font to your Showit site is really quite easy and it only takes a few simple steps. Let’s dive in!
How To Add a Custom Font to Showit
Whether you’ve purchased your custom font from Creative Market or a font foundry like Jen Wagner Co, the first thing to make sure you have is the WOFF file of the custom font.
(And if you’re in need of a custom font, here’s my round-up of the best Jen Wagner fonts.)
As a quick font file type lesson, WOFF stands for web open font format and it’s a font file that is specifically created and compressed for use online.
If you only have the OTF or TTF file of the custom font, don’t worry—there’s an easy solution!
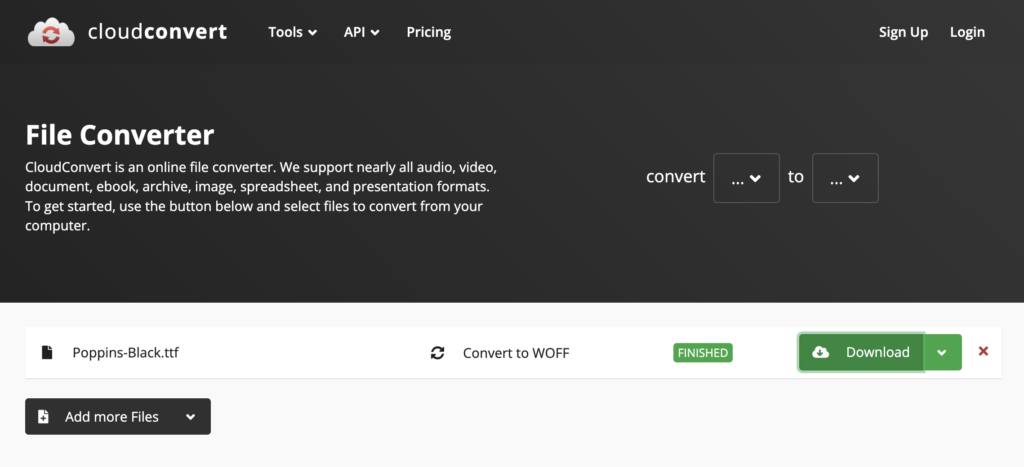
You’ll use the WOFF converter from Cloud Convert.
First, select the font file from your computer. Once the font has been added to the converter, select “WOFF” from the dropdown menu next to “Convert To…” Then you’ll hit the red “Convert” button and the converter will work its magic!
Once the custom font file has been converted, you’ll click the green “Download” button to download and save the WOFF font file you just created.
How To Import Your Own Fonts Into Showit
Now that you have the WOFF file of your custom font, it’s time to add the custom font to Showit. To do so, you’re going to upload the custom font to your Showit media library.
And to keep your media library organized, I always recommend creating a folder just for your custom fonts.
So to import your font into Showit…
- Click on “Media Library” in the navigation panel on the left-hand side
- Select the font folder you created
- Click the “Upload Files” button in the lower left-hand corner of the pop-up screen
- Select the WOFF file of the custom font
Now that your custom font has been added to your Showit media library, it’s time to add the font to your Showit design settings.
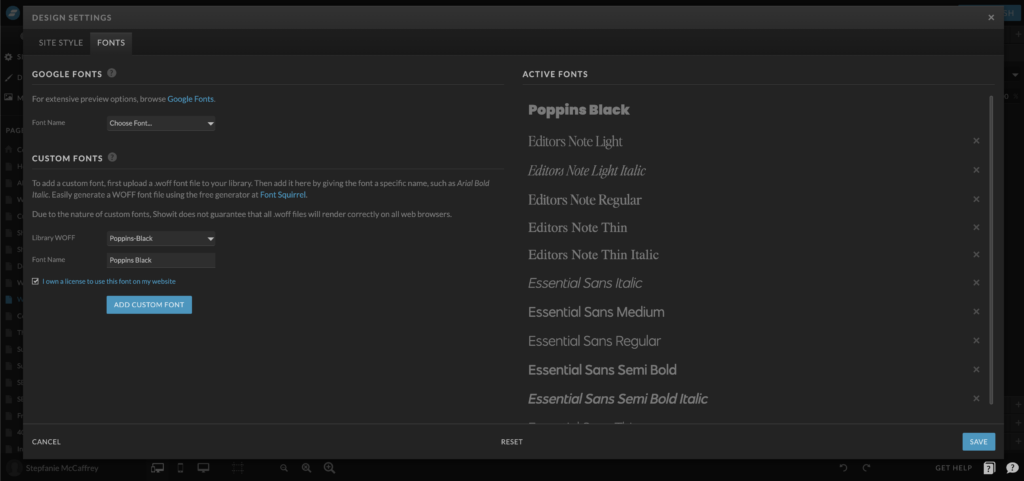
To add your custom font to your Showit design settings…
- Click on “Design Settings” in the navigation panel on the left-hand side
- Click on the “Fonts” tab
- Under the “Custom Fonts” section, select the font from the dropdown menu
- In the “Font Name” space, add a name for the font (keep it as simple and specific as possible, especially if you’re adding multiple custom fonts or multiple weights of the same font)
- Select the checkbox to confirm that you own the license to the custom font
- Click the blue “Add Custom Font” button to officially add the custom font to your Showit site
- Click the blue “Save” button in the lower right-hand corner
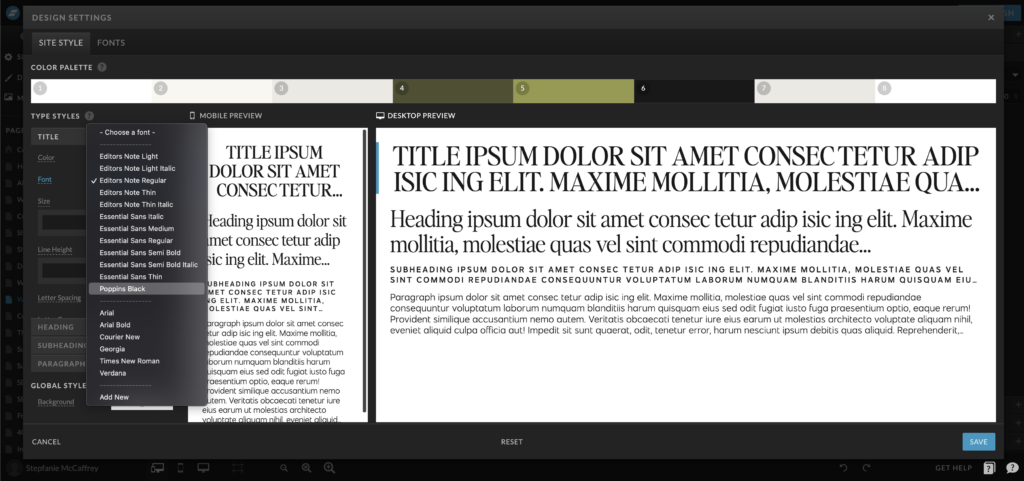
Now that your custom font has been added to Showit, you can go ahead and set the font as one of the font options in your site styles!
You’ll notice in the font dropdown that there are essentially 2 sections separated by a dashed line. The fonts listed above the dashed line are the custom fonts you’ve added to Showit. The fonts below the dashed line are the free Google fonts that Showit provides.
How To Add Adobe Fonts to Showit
Adobe fonts aren’t currently supported in Showit. But as someone who loves CSS code, I have a workaround for you so you can use those beautiful Adobe fonts you have for your brand!
I was first introduced to code back in my corporate career in my first job out of college. I had to code some elements for a weekly newsletter that was sent out. My love for code grew as I designed Squarespace websites for many years.
And now I can add some really fun things to Showit websites! So it’s been great to see that skillset not only grow but also to be so transferrable between careers and platforms.
Okay, back to adding Adobe fonts to Showit.
Since Adobe fonts are supported in Showit, the first step is to find a nearly identical Google font, essentially a dupe of the Adobe font you want to use. I’ll be honest—this is the hardest part of the process.
And since Adobe fonts aren’t supported, they don’t appear on the backend of Showit when you build and edit your site. Adobe fonts only appear on your live site.
This is why finding a similar Google font is so important! You want to know that your design is going to look great live with the Adobe font you have.
So for this example, let’s say that one of your brand fonts is Calluna—a serif font from Adobe. It’s more of an assertive serif font, with exaggerated serifs. The exaggerated and precise lines of this serif font make it a modern and clean alternative to other old-style types.
And for your Google dupe font, you go with Nanum Myeongjo font in bold. When you place these 2 fonts next to each other, you can see just how great of a dupe the Google font Nanum Myeongjo is for the Adobe font Calluna.

Now that you have your Google dupe font, you’ll head to your Showit design settings and set that as your font—be it for a heading, subheading, or paragraph.
Once you’ve set those fonts in your Showit design settings, you’ll head to Adobe Fonts to do a few things to get your Adobe brand font—Calluna in this example—to actually appear on your Showit site.
What you’re going to be doing is adding the font to a Web Project. All Abode Fonts have a license to use them on websites…as long as you install them properly to avoid unnecessary licensing fees.
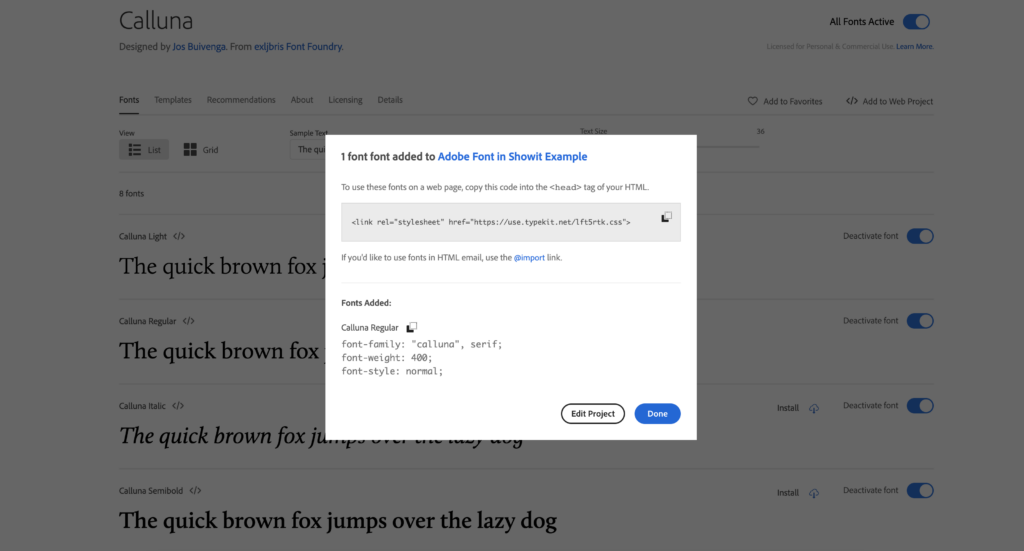
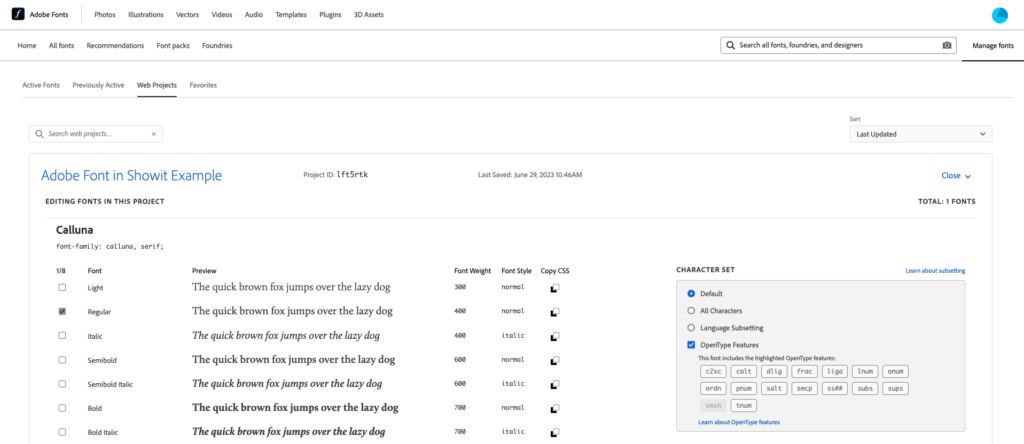
So in Adobe Fonts, you’ll find the font you want to use. Scroll down until you see the font weight/style that you’re looking to use. In this example, I’m looking for Calluna Regular.
Next to it, you’ll see an icon that looks like this: < / >
You’re going to click on that and a pop-up will appear to add this specific font to a Web Project. You can add it to an existing Web Project or create a new project. Then you’ll click the blue “Create” button.
If you have more font weights to add to your Web Project, go ahead and repeat those first few steps and add them to your Web Project by selecting it from the dropdown.
Once you have all of the font weights and styles added to your Web Project, you’re going to work on adding them to your Showit site using code. And I don’t want the word “code” to scare you—you’re just copying and pasting a few things, I promise!
So in Adobe, you’re going to click “Manage Fonts” in the upper right-hand corner below your profile icon. After the page loads, make sure you select “Web Projects” from the options on the left-hand side of the screen.
You should see the Web Project you just created listed first. And in the middle of the screen for your Web Project, you’ll notice it says “Embed Project” with a short line of code. Click the double-box icon to copy that code.

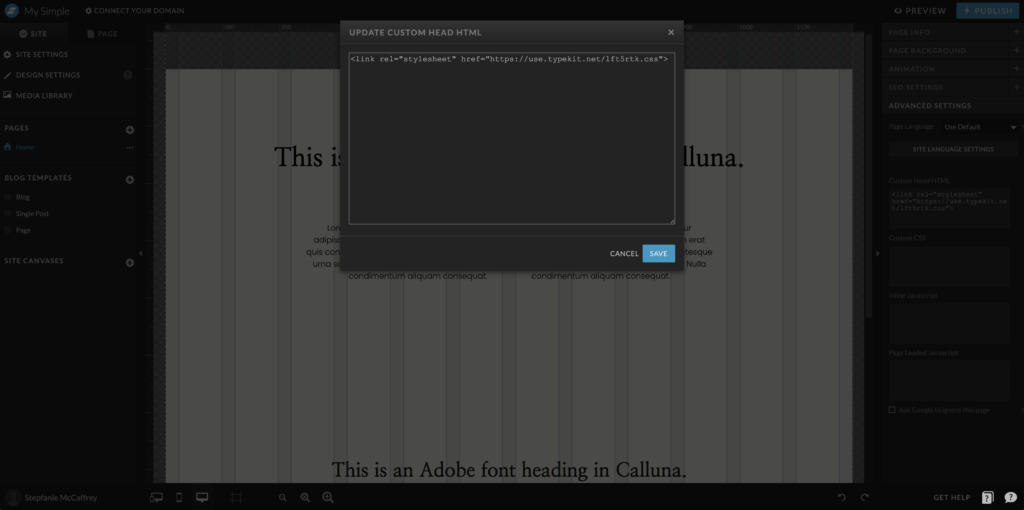
Once you’ve copied that code, you’re going to head back to Showit and add it to the <head> tag in the Advanced Settings section…
- You’ll go to a page of your site and click on “Advanced Settings” in the right-hand navigation column.
- You’re going to paste the code you just copied from Adobe into the first box where it says “Custom Head HTML.”
- Then hit “Save.”
You’re going to repeat that for every single page of your website. Yes, this code needs to get added to every single page where the font will be appearing.
A tedious task, yes. But it’s so worth it to be able to use those beautiful, Adobe fonts you have for your brand!
Now that we’ve added that line of code to the Custom Head HTML section in Showit, we need to add some Custom CSS code to style the Adobe font. And yes, you’ll have to do this on every single page of your site as well.
So we’re going to go back to your Web Project in Adobe and click “Edit Project.” We’re going to be grabbing another small piece of code (CSS code this time) that is going to allow us to style the Adobe font…
- Find the font-weight that you activated for your Web Project
- Click the double-box icon under the “Copy CSS” column to copy the CSS code.
- Head back to Showit to add the code. But this time, you’re going to paste it into the “Custom CSS” box in the Advanced Settings.
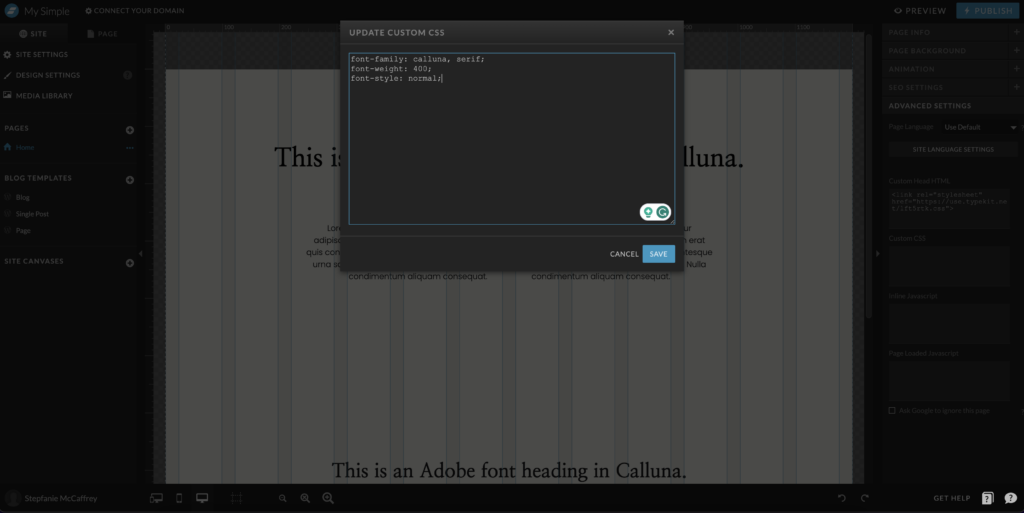
On its own, this code doesn’t really mean anything. If you were to hit save, you wouldn’t see any changes to the font on the preview or live site. What we need to do is add specific styling to this.
This is going to be a multi-step process. But I promise I’m going to make it very easy for you to follow along with!
You’re going to be adding a bit more code to that Custom CSS box in Showit. And you’ll integrate that code from Adobe into these extra bits of code.
And since I’m making this super easy for you, here are the codes you can copy and paste! Based on what setting you are using your Adobe font for—be it for title, heading, subheading, or paragraph—you’ll only need to copy the set that you specifically need.
You’ll need both the .d and .m sets of code for each, so be sure to copy over both. And why is that? The .d is for the desktop version of your site and the .m is for the mobile version of your site. Pretty cool, right?!
So here are the sets of CSS code for Showit to style your Adobe font…
TITLE (H1)
h1, .d.st-d-title [
font-family: NAME
]
h1, .m.st-m-title [
font-family: NAME
]
HEADING (H2)
h2, .d.st-d-heading [
font-family: NAME
]
h2, .m.st-m-heading [
font-family: NAME
]
SUBHEADING (H3)
h3, .d.st-d-subheading [
font-family: NAME
]
h3, .m.st-m-subheading [
font-family: NAME
]
PARAGRAPH (p)
p, .d.st-d-paragraph [
font-family: NAME
]
p, .m.st-m-paragraph [
font-family: NAME
]
Now, after you’ve copied and pasted the code sets from above based on your specific needs, you need to replace the “font-family: NAME” placeholder with the code from Adobe that has font-family, font-weight, and font-style.
You’ll see in the screenshot below how I’ve replaced “font-family: NAME” for the .d portion of the code but have not yet for the .m portion of the code.
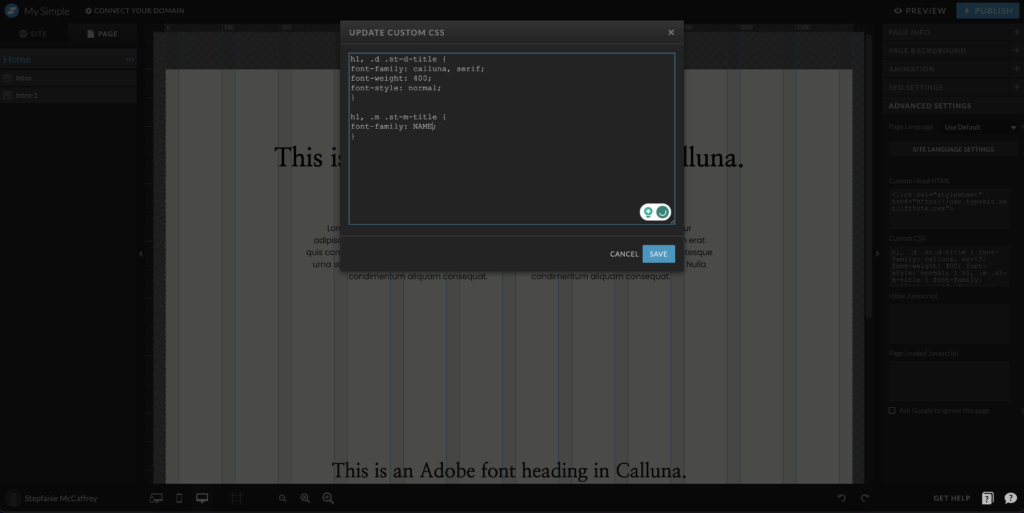
The combination of these 2 bits of code is what officially adds and styles the font. It’s what makes the Adobe font will appear live on your site. It’s like a coding recipe!
Oh, and don’t forget to delete that bit of code from Adobe that you first added to the Custom CSS box once you’ve integrated it into the code recipe. Hit the blue “Save” button on the pop-up and then hit “Publish” to make the changes live on your site.
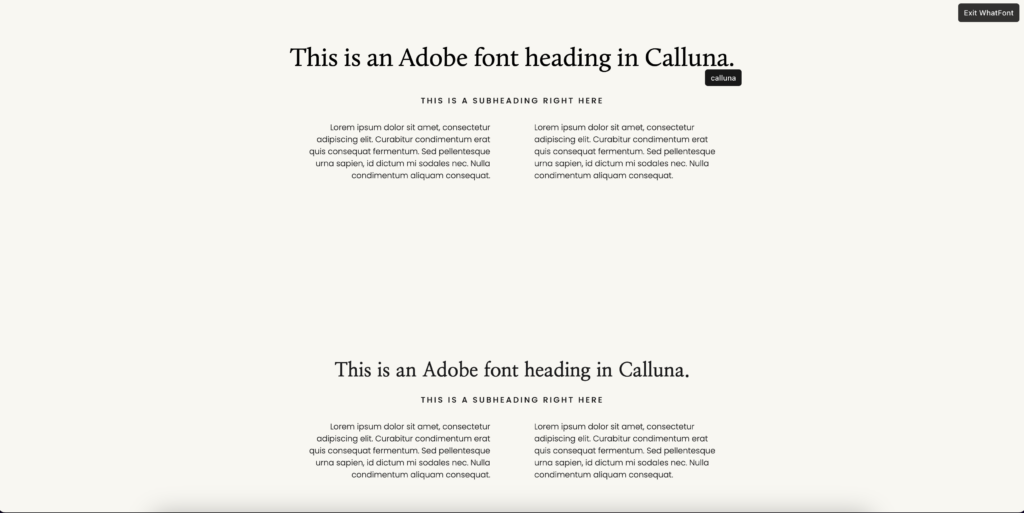
And of course, you’ll want to make sure your custom Adobe fonts are loading on your Showit website.
The easiest way to do this is to install the “WhatFont” Chrome extension. Once installed, you can click to activate the extension. Then hover over any font on your website (or any website for that matter) to see what font it is. If the Adobe font you installed on your Showit site appears, you’re good to go!
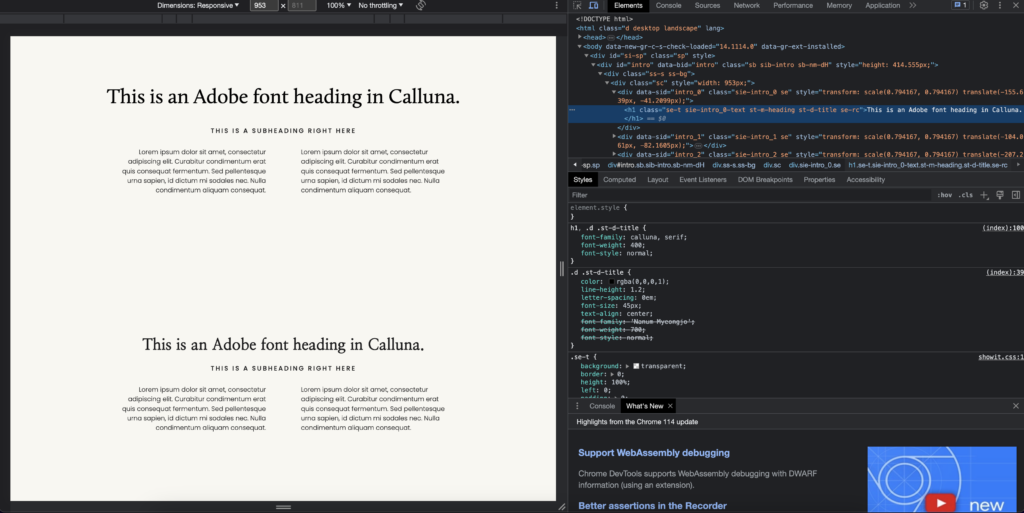
The other way to check this is by using the inspect tool. You’ll head to your site, right-click anywhere on the page, and select “Inspect.” By going this route, you’ll be seeing allllll of the code that makes up your site. So if that scares you, stick with the WhatFont extension option.
Once you’re in the inspect tool panel, you’ll click the dotted box with an arrow in the upper left-hand corner to activate the select tool. You’ll then hover your mouse over a section of text on your site. The small pop-up that appears will let you know what font it is. Pretty cool, right?!

Or with the select tool activated, you can hover over and click on a section of text on your site. The code in the panel will adjust to show you details of that specific text element. So you can see in the screenshot below that it’s actually crossed out the Google dupe font I was using on the backend of Showit and I can see that the Adobe font I’m using (Calluna) is activated.
And there you have it! Your simple guide to adding custom fonts to your Showit website—even how to add Adobe fonts to Showit! Let me know if you give this a try on your own site or on a client’s site. And if you have any questions, I’m always here to help!
Did you love this post? Share it!
Hey there, I'm Stepf—Google Superfan & Passionate Educator
And the showit website designer and seo strategist you’ve been looking for
Through strategic Showit website design and done-for-you search engine optimization, I work with innovative and creative business owners like you to build magazine-worthy websites that effortlessly attract your ideal client—so much so that they’ll never want to leave.
Get to know me


